

Viewing and changing parallel scans
Security for Confluence distributes scanning to every Confluence Data Center node, and by default runs 2 scans in parallel per node. This number can be configured in the UI or via the REST API. Scans beyond the number of scans run in parallel are stored in a queue. This queue is accessible to all Confluence nodes.
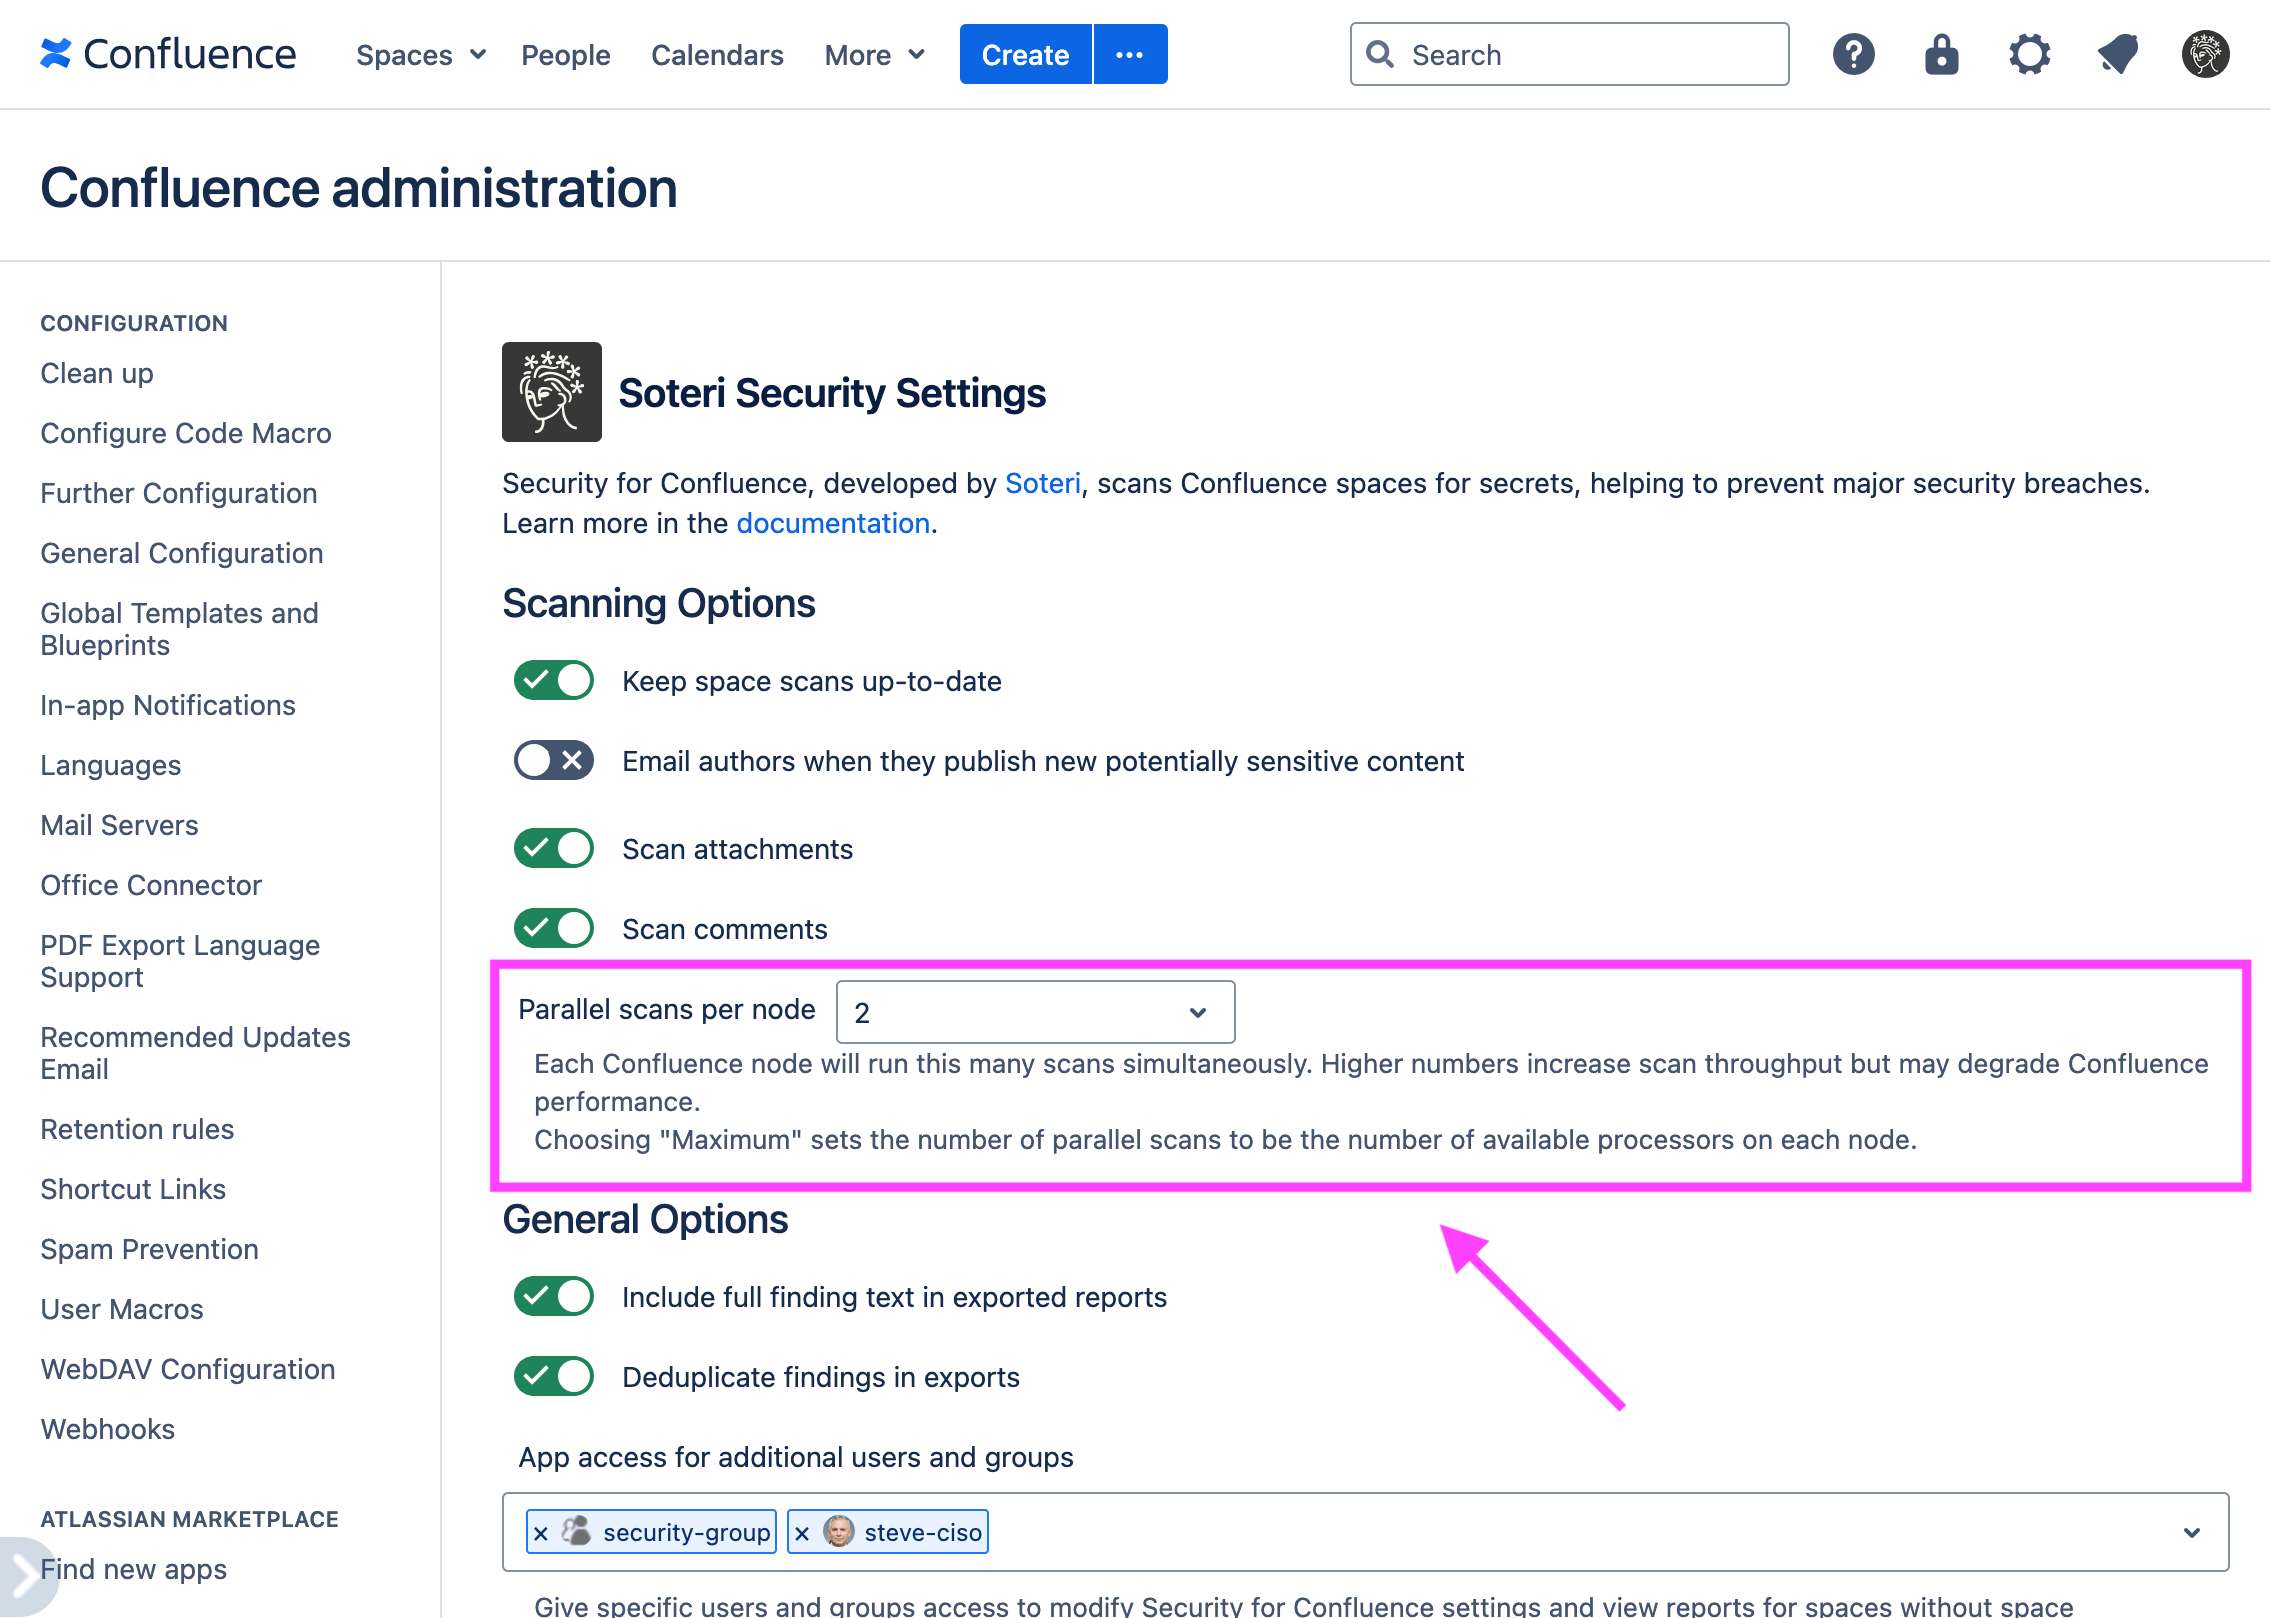
Changing parallel scans via the UI
To change number of scans in parallel per node, visit the Soteri Settings page. You can see a dropdown where you can choose number of parallel scans per node.
Troubleshooting number of available processors
In certain situations, the number of processors detected by Security for Confluence might not match the number of processors actually available to the server. If you are running in a Docker deployment and believe you should have more processing power available, you should update your JVM flags as discussed in https://www.databasesandlife.com/java-docker-aws-ecs-multicore/
Changing parallel scans via the REST API
For information on REST API usage, see REST API For Scripting and Automation | Viewing and Changing Settings
-
This call returns a positive integer which is the configured number of parallel scans.
-
To maximize scanning performance, you can specify the value
0to use all available CPUs.
Changing maximum rule timeout via the REST API
For information on REST API usage, see REST API For Scripting and Automation
By default, Security for Confluence limits the time used to apply one rule to a line to 20 seconds. If your pages or attachments contain very long lines, you may want to increase this time.
The maximum timeout is used for lines which are 10MB or larger, while shorter lines will use proportionally less time. If the maximum is lower than the default (20s), it will be used for all lines; this may be useful for very resource constrained environments.
Modifying which Confluence nodes run scans
If you have multiple Confluence Data Center nodes running, you can choose which ones run scans. This feature is currently only supported via the REST API.
Name the nodes that should participate in scanning
Note that Confluence Data Center will not prevent you from naming nodes identically. If two nodes are named identically, and Security for Confluence is configured such that scans should run on that node name, then scans will run on both nodes.
Use Confluence’s concept of naming cluster nodes to name the nodes you wish to participate in scanning. See the “Changing the node identifier” section in Atlassian’s documentation on Adding and removing Data Center nodes.
See and change which nodes are running scans
To see which nodes are participating in scanning:
curl -u admin -X GET https://{confluence.server}/rest/security/latest/cluster/scan-nodes
where
-
adminis your Confluence admin user (you’ll be prompted for a password), and -
confluence.serveris the URL of your Confluence server.
This will return a JSON formatted response which looks like this:
{
  "scanNodeNames": [],
  "message": "Scan node configuration is empty. All nodes will participate in scanning"
}
To change which nodes run scans:
curl -u admin -X PUT https://{confluence.server}/rest/security/latest/cluster/scan-nodes -H "Content-Type: application/json" -d '{"scanNodeNames": [{scanNodeNames}]}'
where
-
adminis your Confluence admin user (you’ll be prompted for a password), -
confluence.serveris the URL of your Confluence server, and -
scanNodeNamesis a list of the node names you want to participate in scanning; e.g.,"confluence-scan-node1", "confluence-scan-node2".
To reset back to the default behavior, where all nodes participate in scanning, send a DELETE to the same endpoint:
curl -u admin -X DELETE https://{confluence.server}/rest/security/latest/cluster/scan-nodes
or, you can make scanNodeNames empty:
curl -u admin -X PUT https://{confluence.server}/rest/security/latest/cluster/scan-nodes -H "Content-Type: application/json" -d '{"scanNodeNames": []}'
Both have the same effect.