

Webhook integration is an advanced feature. Contact your administrator about purchasing a license upgrade for Security for Jira.
Audit log events can be sent to a Slack webhook. Webhook integration can be added and edited on the settings page.
Message delivery is best-effort. We cannot guarantee that every audit log message is delivered.
Integrating with Slack

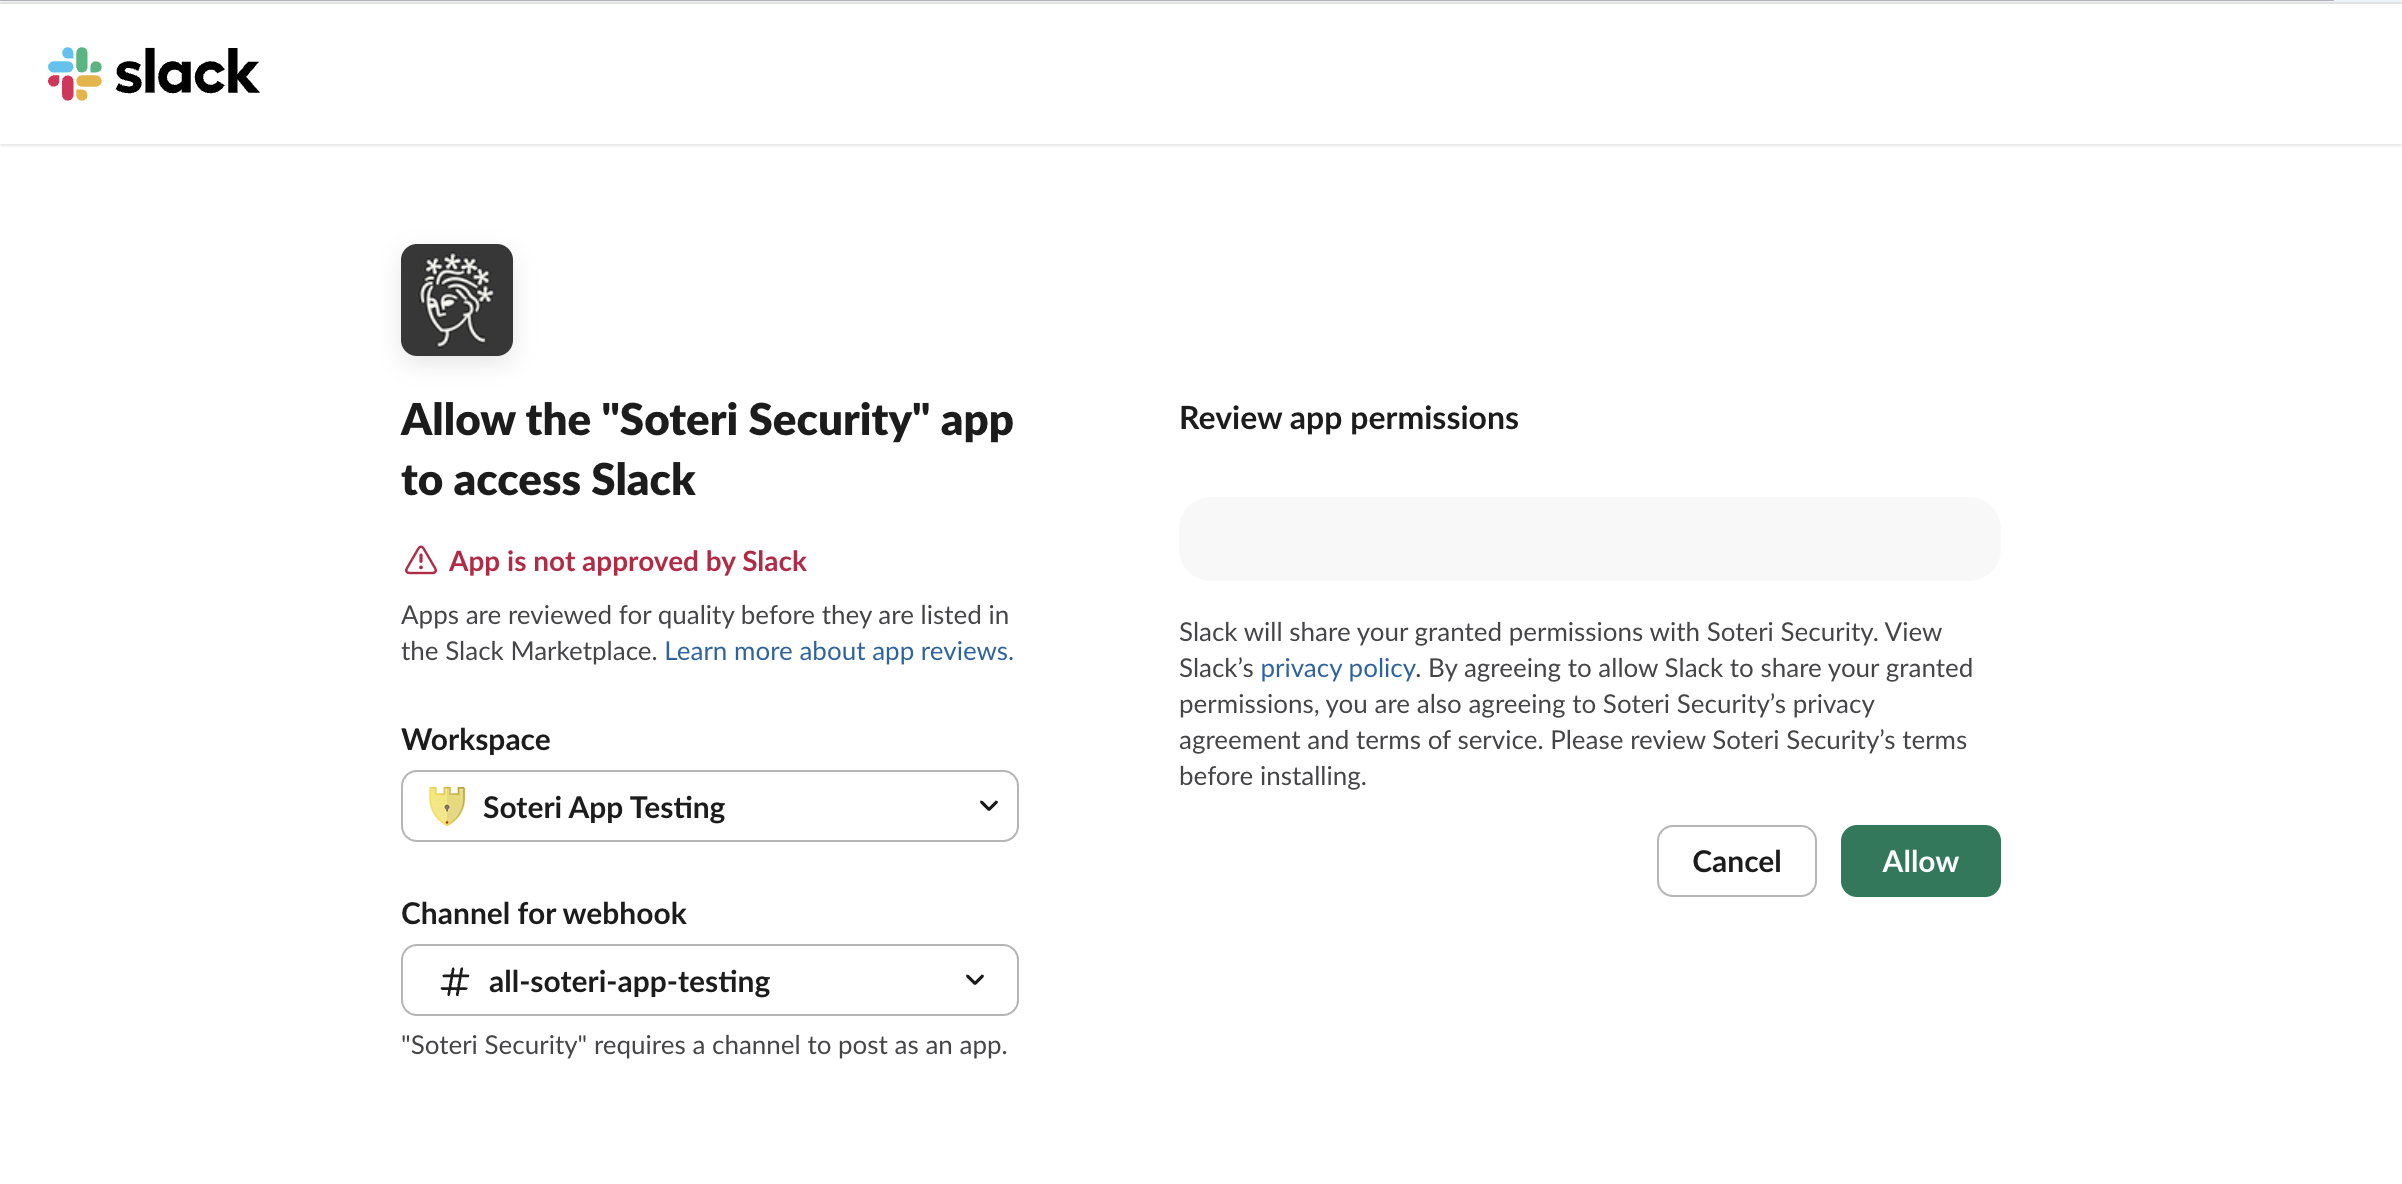
Clicking the “Install using OAuth” button installs our Slack app using OAuth. A pop-up will open, where you can select the workspace and channel that messages will be sent to.
The Slack app only requests permission to post messages using the webhook; it cannot read messages in your Slack workspace.
After installation completes, the new webhook will appear in the table below.

The first column contains the display name of the webhook, which defaults to the channel and workspace name. The details column shows the number of event types which the webhook will receive message for, and hovering over it will show a tooltip containing the events.
Custom Webhooks
Custom webhooks allow integration with SIEM solutions such as Splunk, Microsoft Sentinel, and IBM QRadar.

To install a custom webhook, enter the display name and URL for the webhook and click “Save”. The URL must be HTTPS, and cannot use IP addresses as the host, or the userinfo subcomponent (e.g. user:pass@example.com).
The URL must satisfy the following requirements:
-
Must use HTTPS
-
Good:
https://www.example.com/webhook -
Bad:
http://www.example.com/webhook
-
-
The host cannot be an IP address
-
Bad:
https://10.0.0.1/webhook -
Bad:
https://[2001:db8::7]/webhook
-
-
The userinfo subcomponent may not be used; instead use authorization headers.
-
Bad:
https://user:password@www.example.com/webhook
-
Configuring Webhooks

Once your webhook is created, you can click the “Edit” button to configure it. Clicking the “Delete” button permanently removes the webhook. After making changes, they must be saved by clicking the “Save” button. Clicking the “Discard Changes” button closes the editing UI without saving changes.
Event configuration
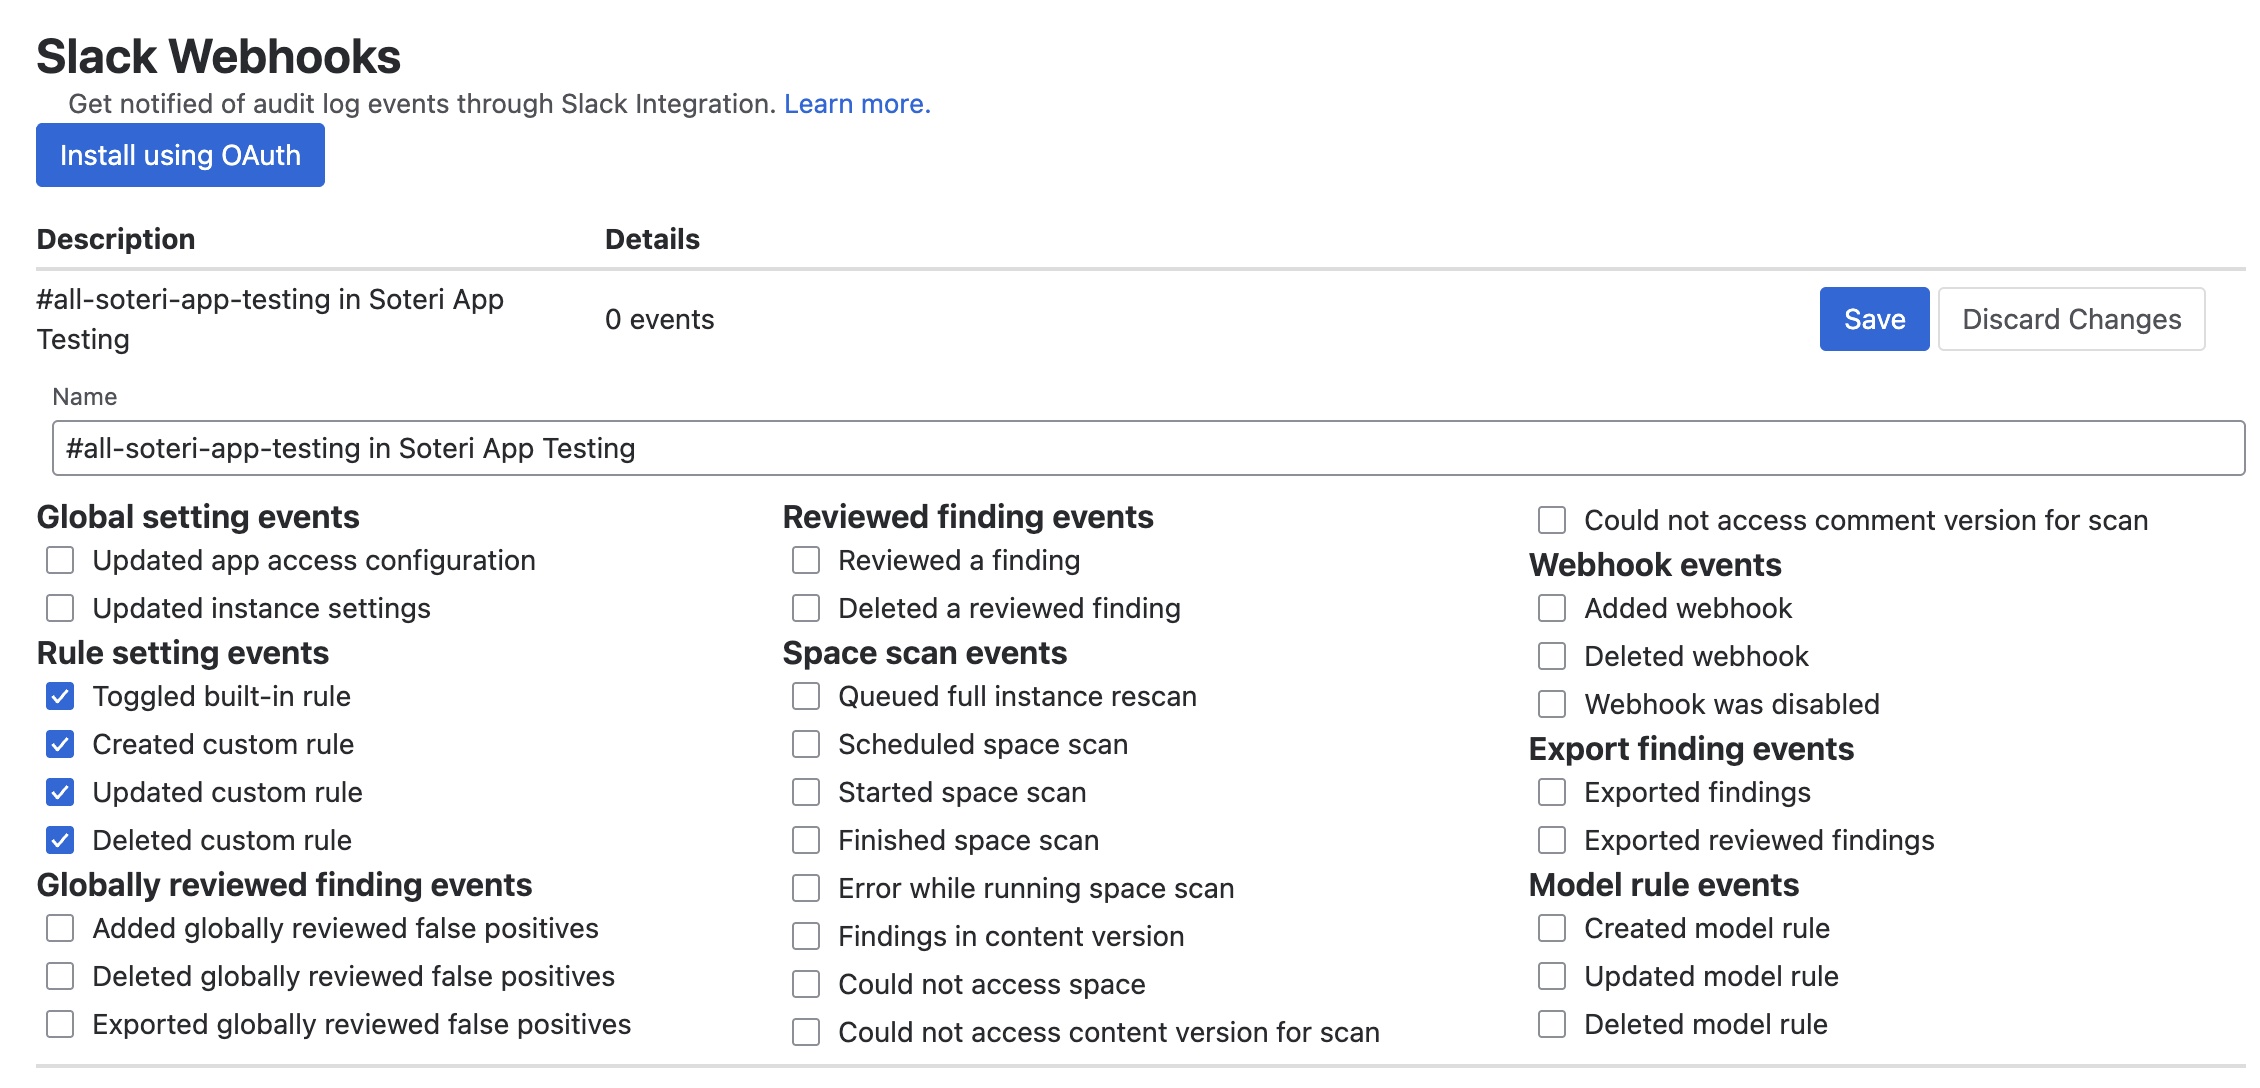
Use the checkboxes to select which events to receive messages for.
Message signing
This setting only applies to custom webhooks.
For custom webhooks, you can configure up to 10 shared secrets which will be used to sign each message using the HMAC-SHA256 digest encoded in Base64. For example, using node.js the signatures for a message can be verified as follows:
import * as crypto from 'crypto';
function isSoteriSignatureValid(secrets: string[], signatures: string[], rawBody: string) {
  if (secrets.length !== signatures.length) {
    return false;
  }
  const expectedHashes = secrets.map(secret => {
    const hash = crypto.createHmac('sha256', secret);
    hash.update(Buffer.from(rawBody, 'utf8'));
    return hash.digest('base64');
  });
  return signatures.every(signature => expectedHashes.contains(signature));
}
One signature will be generated for each shared secret. All signatures will be comma-delimited under the X-Soteri-Signature header. This might look like X-Soteri-Signature:lb+PrQunzcHAzWPY0/vYhUi0040DGrpOLiwH4M8XQYM=,yulBb+TEnAYw3TLXH68ASNla9r1XIKtAmQUZkzBiC24=.

The “Random” button creates a random 32-byte key encoded in Base64, and the “Add” button adds the current value of the text field as a shared secret. The “Remove” button removes the corresponding secret.
Saved secrets are hidden; the first 3 characters are shown to allow them to be identified.
Authorization Header
This setting only applies to custom webhooks.

If your SIEM requires an authorization header to be set, it can be configured by clicking the “Set Authorization Header” button. This will open a modal dialog where you can set or clear the header.
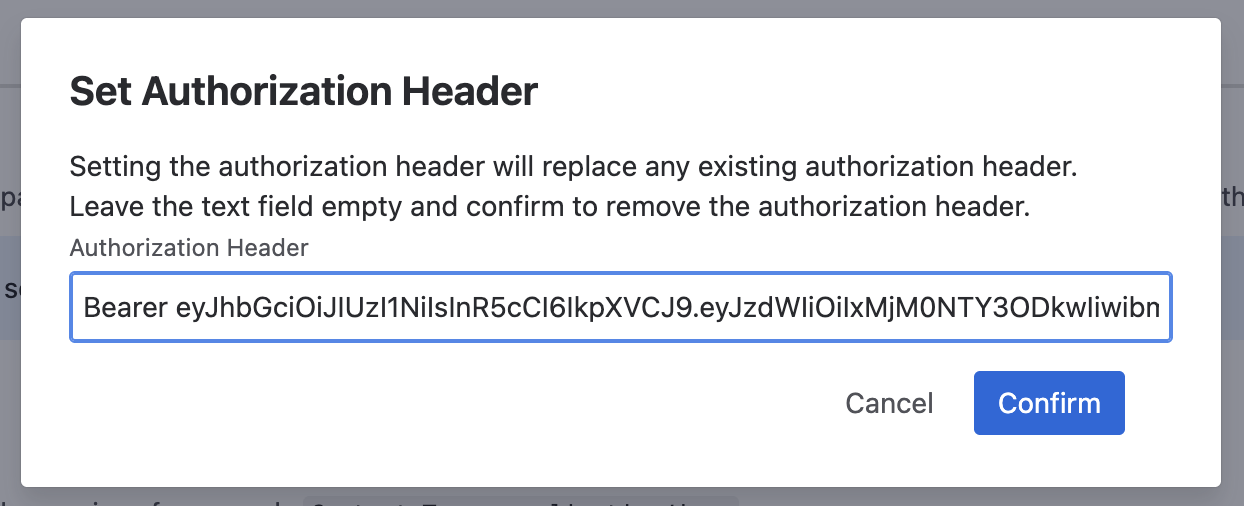
Authorization headers must be entered in the format <auth-scheme> <credentials>; the above screenshot shows an example of a JWT bearer token.
Additional Headers
This setting only applies to custom webhooks.
If any other headers are needed, they can be configured below:

For example, some services or proxies may require the Content-Type header to be set; in this case, application/json is the right choice. Another possibility is to use a custom header to identify the webhook that an event is associated with.